Start Your Journey Today

Start working with our enrollment team to find the best path forward.

XR Foundations: Designer

Please send me information about the XR Foundations: Designer program when it becomes available.

Do You Have the Right Computer/Phone/Headset to Develop for AR and VR on Oculus, Android, or iOS? One Chart and Seven User-Stories that will make it all Clear…

April 18, 2021

So, you want to Develop an Application for VR or AR with Unity…

We guess that you might have a few questions:

  • What about my computer? Is it powerful enough?
  • What about my VR Headset? (Will it work with the computer I have? Does it need a special cord?)
  • What about my Phone? (Does it support Augmented Reality? What if I have an iPhone?, etc.)

Here is a chart to help you navigate, followed by a few user-stories that will help you understand if you do (or don’t) have the necessary Hardware to create XR Software.

VR

AR

Carol (Mac > Quest) ????

Carol wants to develop an app for the Oculus Quest (She wants to build a virtual “Field of Bunnies” experience for her aunt who loves bunnies.), and her computer is a Macbook Pro (laptop).

What she has seen from videos of people developing XR apps is the ability to make a change in the Unity editor, hit save, throw her VR headset on, and be able immediately view the changes from within VR.

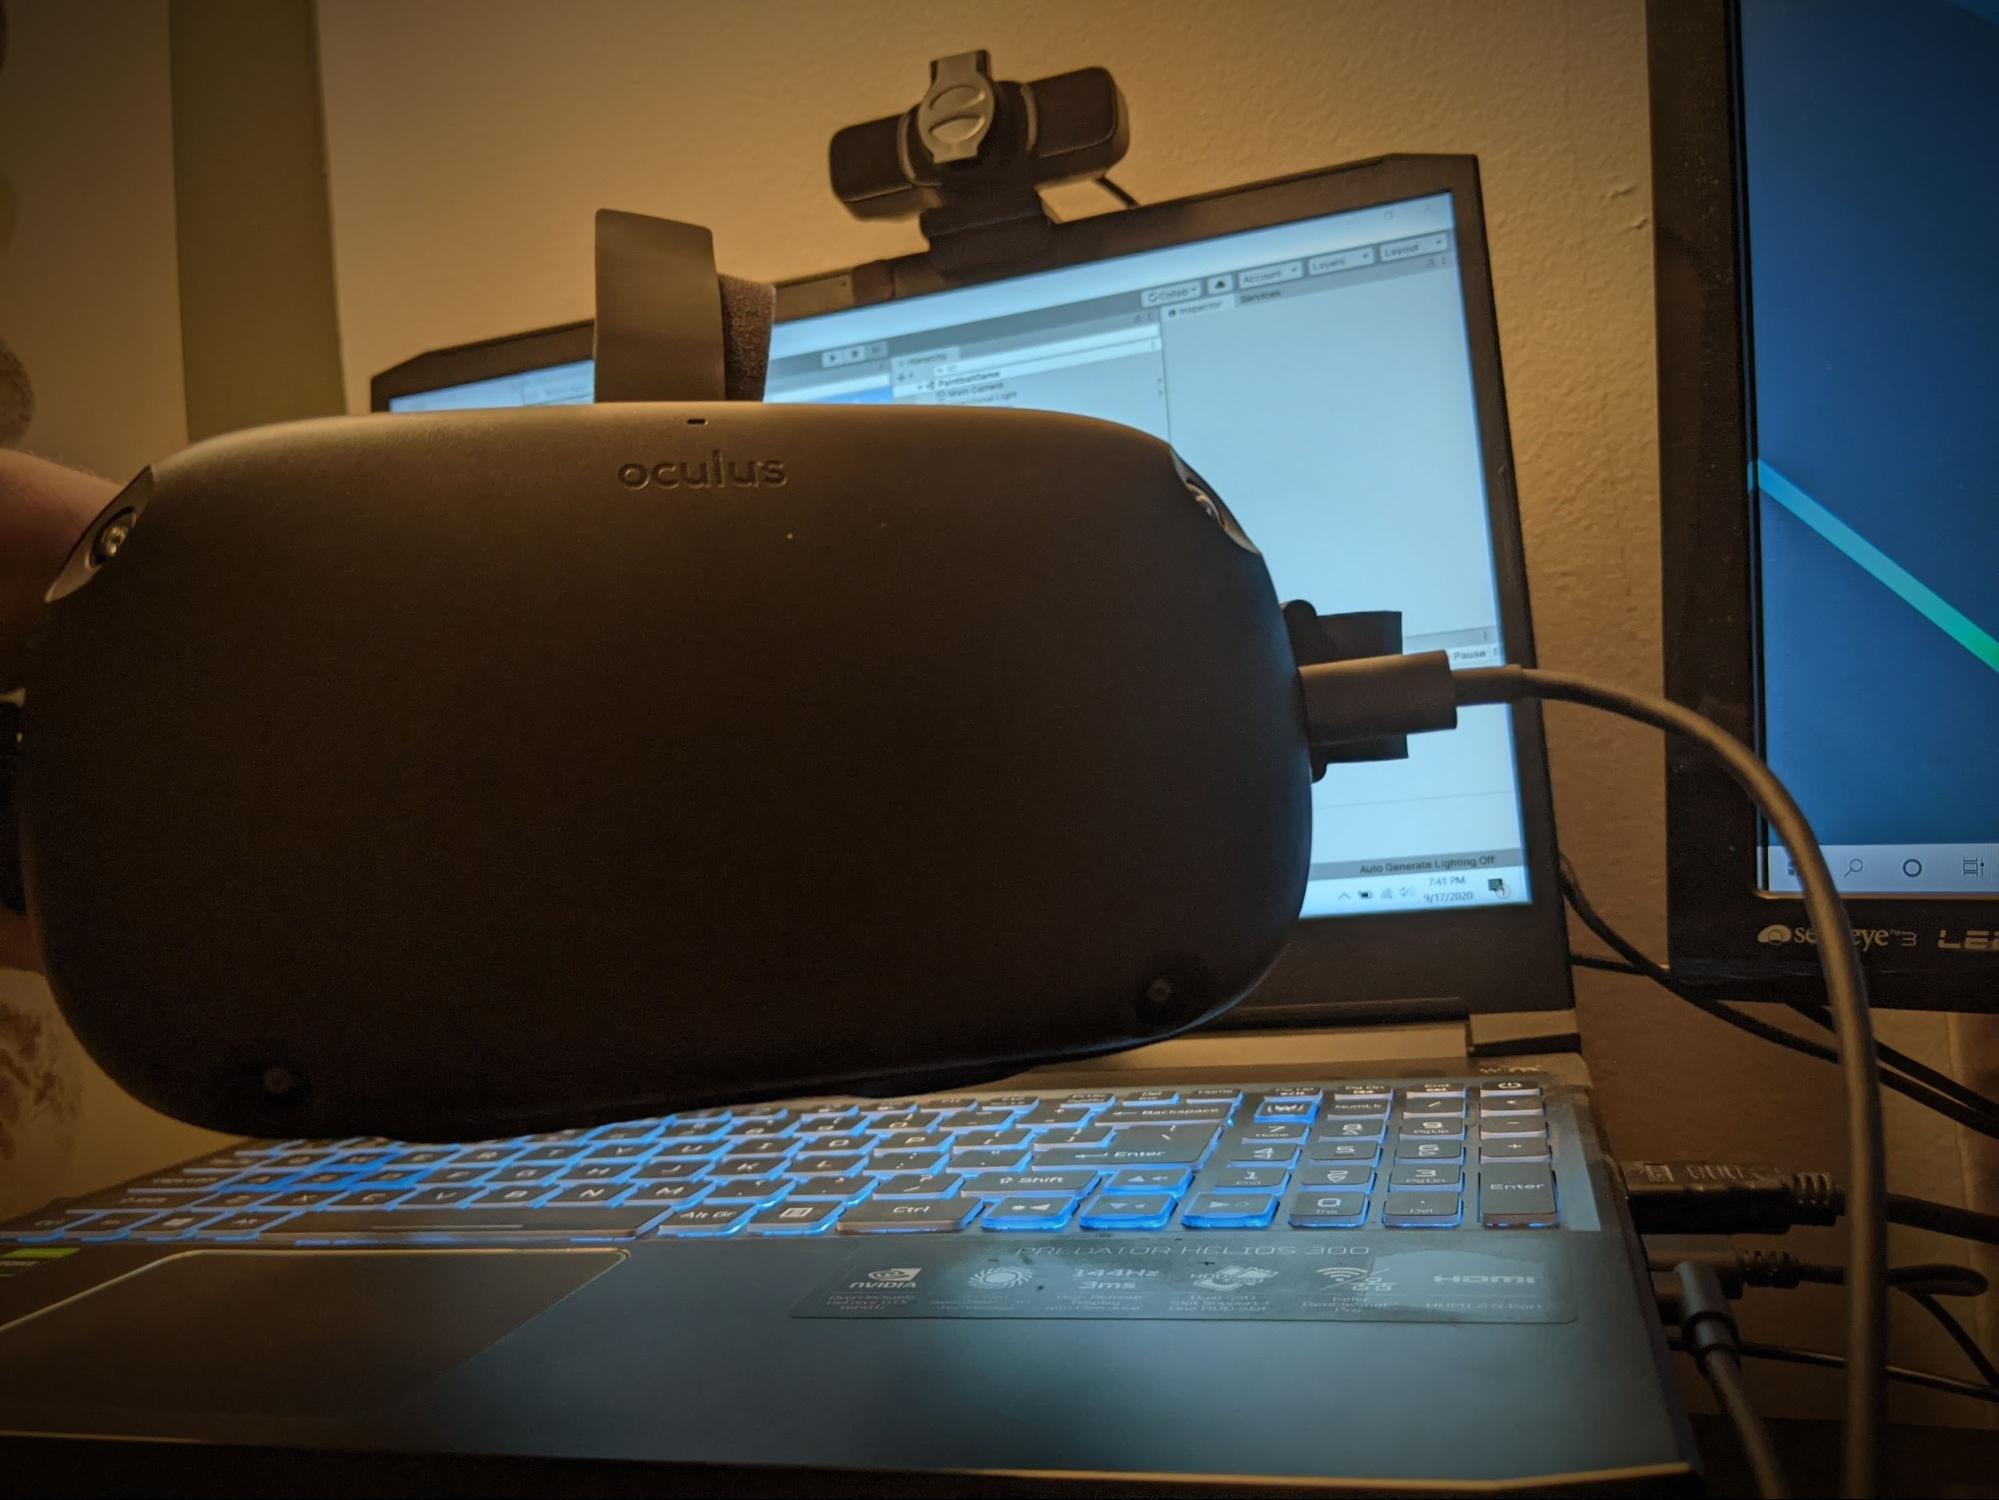
Unfortunately, as she quickly learns, the ability to do live editing like this requires more than just plugging a cord into her computer:

  1. It requires the Oculus Link Software along with her USB cord.
  2. The Oculus Link Software will not run on a Mac.

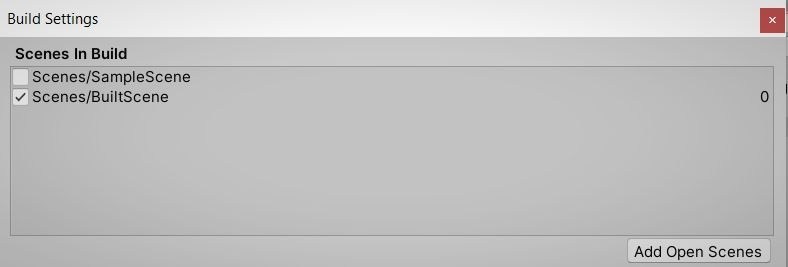
That means Carol’s only real option, other than buying a high-spec Windows 10 PC, is to develop her game on the MacBook… Then, she will need to ‘Build and Run the project each time she wants to see what her changes in Unity have done to the VR game. Alas, the “field of Bunnies” will take a little longer to properly test before she shows the experience to her aunt.

Arnie (Mac > Oculus Rift) ????

Arnie is researching VR headsets, and decides they like the Oculus Rift S headset best. Their next step is to look into what kind of computer they’ll need to run it. 

To their dismay, Arnie’s only computer is a Mac desktop, which will not run Oculus Rift software. They then must debate the merits of buying a Windows machine to run VR or settling for a wireless headset like the Oculus Quest, which has a more limited selection of games to play.

  • After hitting this roadblock, Arnie decides they will invest in a high-spec, ‘VR-Ready’ Windows 10 laptop. They find that not only can they use the Oculus Rift, but they can use pretty much any VR headset they want. 
  • Also, if they decided to use the Oculus Link cable with the Quest 1 they could run any VR experience they could on a Rift. In fact, if they use the Quest 2 with Oculus Link, they could run VR experiences that are even more demanding.

Joshua (Windows Computer > Oculus Go) ????

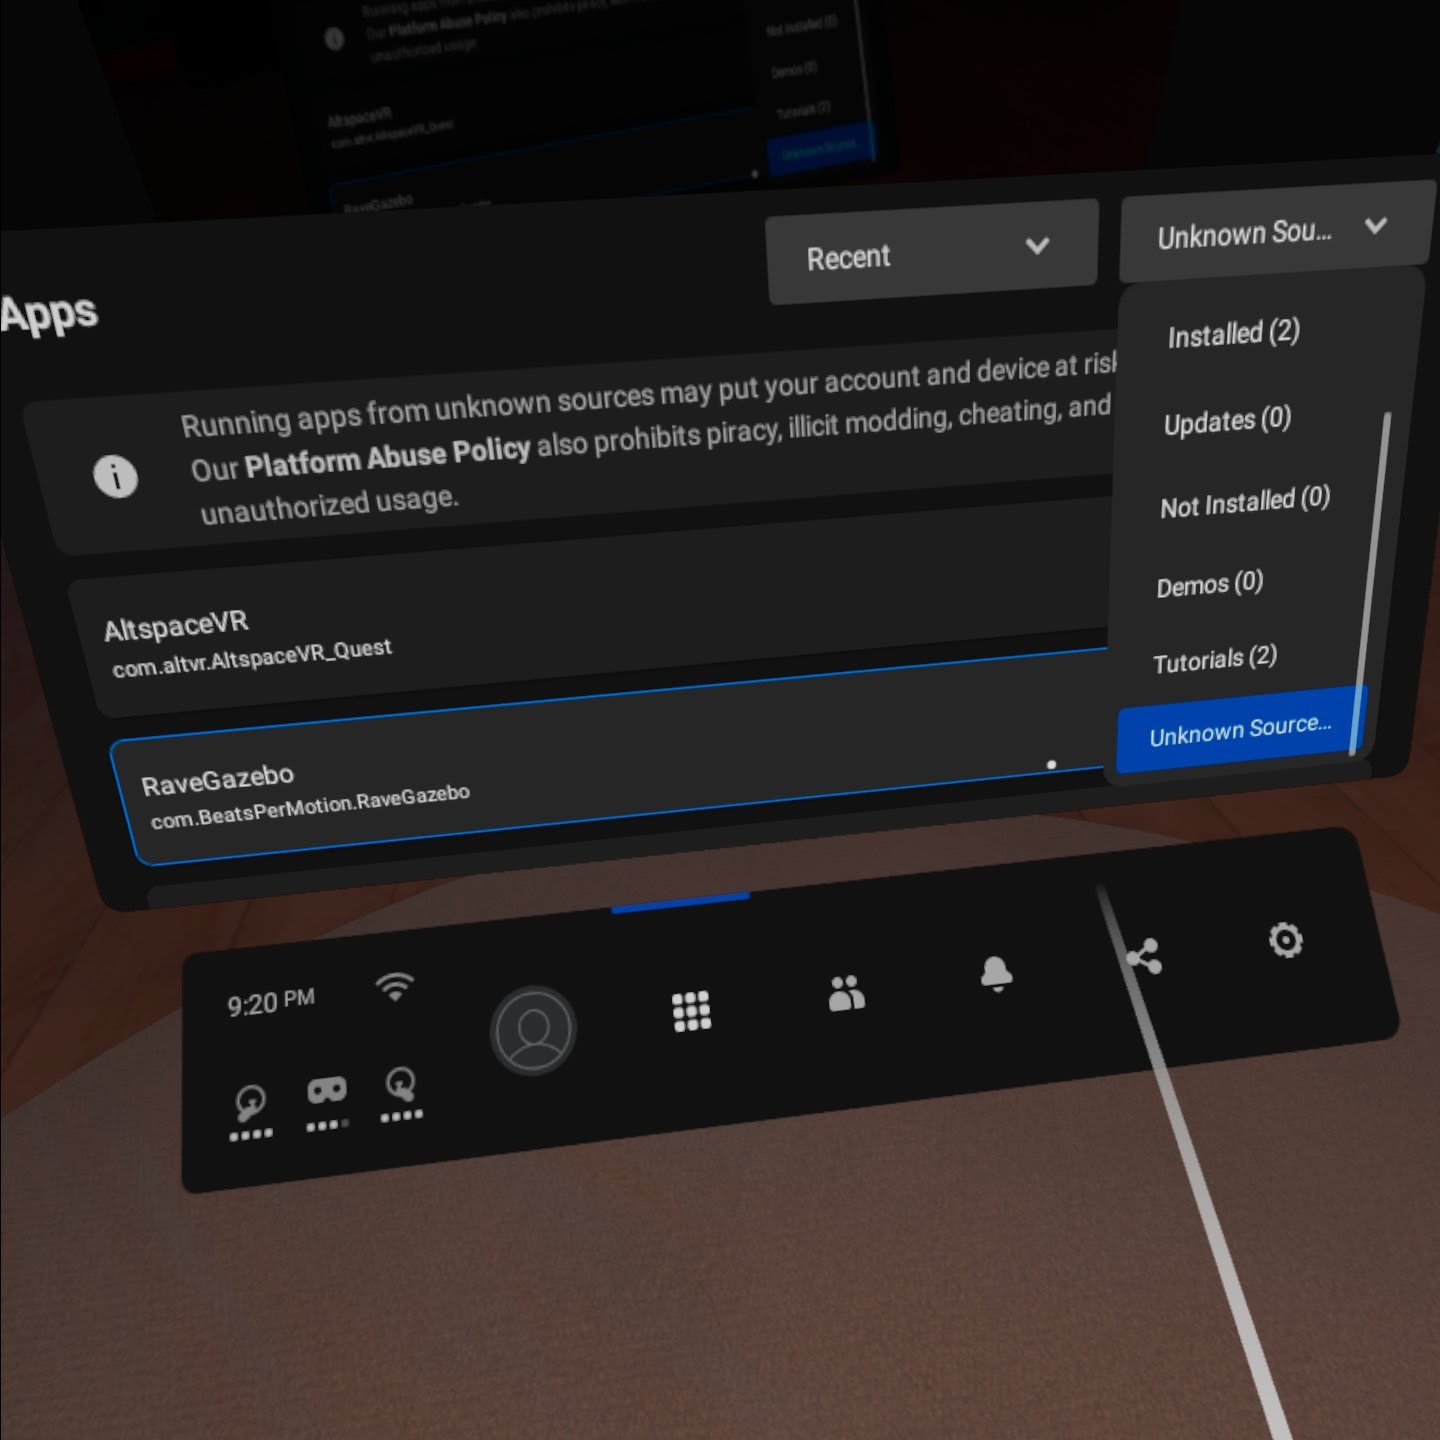
Joshua got an Oculus Go a year ago and has been using it to watch 360 videos on YouTube. Having been inspired by the cool art, he decides to make his own 360 content using Unity on his Macbook. He follows the instructions found on Oculus’s own Developer Blog to set up his Unity project. He uses the same cable he uses to charge the Go to plug it into his laptop and sideloads a quick 5 second test build from Unity. 

Are You interested in learning more about XR development? We are currently accepting applications

Cameron (Windows or Mac > Google Cardboard) ????

Cameron is trying to make VR content on a low budget, so they get a Google Cardboard for their phone. After turning on developer mode on their android phone they are able to connect to their computer and sideload a build from Unity with the Carboard package installed in order to test it.

Cameron (Mac or Windows > AR on ARCore-Compatible-Android Phone) ????

After being a little disappointed with the limitations of developing a Google Cardboard experience, Cameron decides to transition to Augmented Reality development.

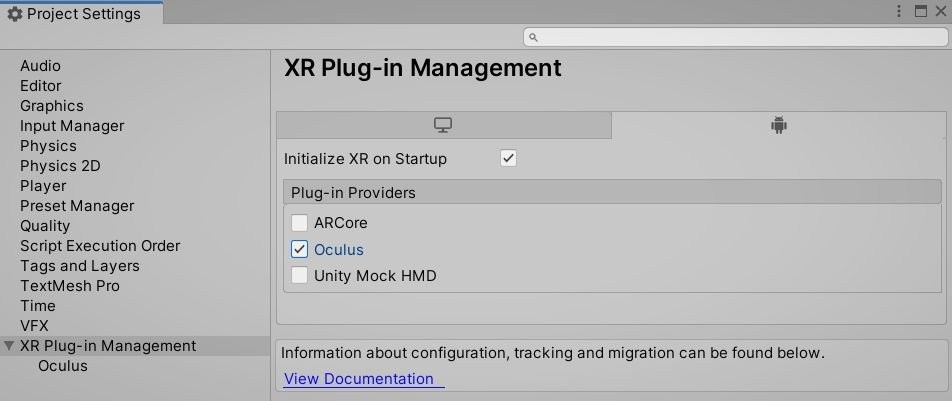
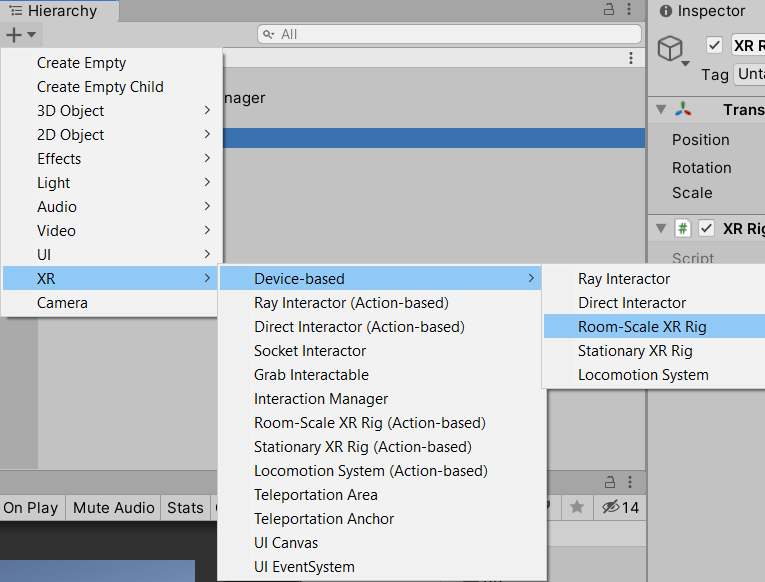
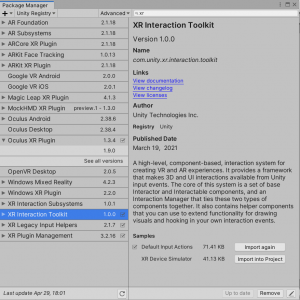
After checking if their phone is compatible with ARCore and keeping developer mode on their android phone, they create a Unity project with the XR Interaction Toolkit and enable ARCore in their build. They’re now ready to develop AR on their android phone from any type of computer, either Windows or Mac.

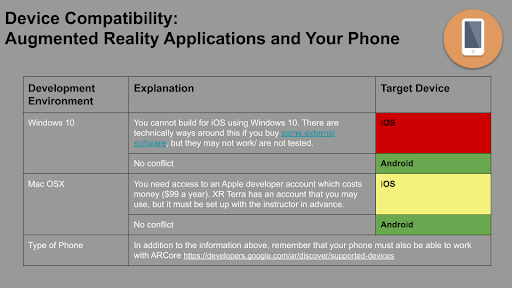
Cameron (Windows> AR on iPhone) ????

Cameron has achieved some success developing AR for their Android phone, and so decides to expand their most recent app onto iOS devices. Unfortunately, their laptop won’t cut it. They can’t use their Windows machine for iOS development. 

Cameron (Mac > AR on iOS) ????

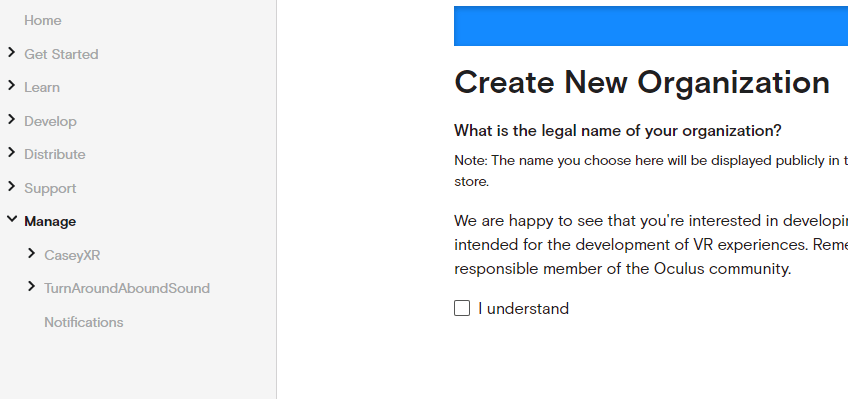
So, Cameron invests in a Macbook laptop, and borrows their friend’s iPad after finding it on the list of ARCore compatible phones. They pay $99 for the Apple developer account and download XCode to be able to load their app onto the iPad. They import the ARKit package from Unity’s Package Manager, and now they can successfully port their app to iOS.

Closing:

Hope these stories have helped your XR dev journey’s beginning a little clearer. Are You interested in learning more about XR development? We are currently accepting applications…

Also, if you have questions about this article, please send them our way.

XR Terra Team

Developing for VR with Quest 2 & Unity for the First Time – A Step-by-Step Guide

October 9, 2020

Getting Started Developing for VR

With the arrival of the Oculus Quest 2, we know a lot of new people will be inspired to create their very first VR experiences. That is why we have put together this step-by-step guide to getting started developing for VR with your Quest 2. Pull up a chair and get ready to develop for the Quest platform!

The first thing to acknowledge if you are new to XR development is that you need three things to create a VR application:

  1. A Game Engine
  2. An SDK (Software Developer Toolkit)
  3. A VR Headset (+ compatible USB cord & the Oculus Smartphone App)

In this article, the three of these that we will look at are the most popular choices for VR at the current moment:

The Unity Game Engine
The Unity XR Interaction Toolkit
The Oculus Quest or Oculus Quest 2

Not coincidentally, these are the tools we work with most commonly in our 8-Week VR Developer Bootcamp. Let’s use them now to get you up and running. For this guide, you will not need to know C# or write any code. Also, we will use the Unity Interface and other GUI software to configure everything for your VR scene.

Additionally, do you want the chance to take care of some of these steps and download a free VR game at the same time? Try this SideQuest tutorial, and then come back to this article when you’re ready to develop your own game.

Step by Step Guide

  1. Set up the Right Version of Unity
  2. Adding Modules
  3. Add the XR-Related Unity Packages to Your Project
  4. Project Build Settings
  5. Creating a Quick Scene
  6. Android Tools and Sideloading Time
  7. Getting your phone and Quest ready

Step 1. Set up the Right Version of Unity

Unity is constantly updating and improving its software by creating new versions. In order to pick the version we need, you need to follow a few steps:

Download Unity Hub

Developing for VR begins with downloading Unity

Whether or not you use the free or paid version, you will need to create a license in order to use Unity. You can either follow the instructions in this video linked here, or follow the directions below.

  1. Click on the gear icon in the top-right-corner next to the profile icon.
  2. Navigate to ‘License Management’, and then click on the blue “Activate New License” button.
  3. From the window that pops-up, select the appropriate license you will be using. (Thankfully, the Unity Personal license is free!)

If you get lost in these written steps, there is always the video instructions.

Once Unity Hub is installed, you can download Unity itself. From installs, Select the right version of Unity:

  • Use the “Installs” Tab in Unity Hub to find and select the version you want to use:
  • Note: To support the XR Interaction Toolkit (i.e., VR functionality) must be versions 2019.4 or later.
  • Ideally, choose a version with Long Term Support (LTS).

Step 2. Adding Modules

Under the Installs Tab, add these modules to your version of Unity:

  • If this is your first time using Unity, you will want to add “Microsoft Visual Studio 2019”; it’s a very nice Integrated Development Environment (IDE) for coding in C# within Unity (which most Unity devs use).
  • You will need to check the box for “Android Build Support” since the Oculus Quest is technically an Android device (The Quest runs on a customized build of Android 7, and the Quest 2 runs on Android 10.)

Step 3. Add the XR-Related Unity Packages to Your Project

Note: Adding the Unity Packages required for XR will be a process you repeat for every new Oculus Quest project. You will get used to it over time.

Create a new Unity Project from Unity Hub.

  • Make sure to save your project somewhere you can find it later.
  • For “template”, the choice between 3D, 3D with Extras, and the Universal Render Pipeline are a little too detailed to explain in this article. However, we can tell you that while either would work for a starter VR project, the ‘Universal Render Pipeline’ has more optimized graphics (which you will learn to appreciate as you get further into VR development).
  • Choose ‘Universal Render Pipeline’.
  • Once selected, hit the “Create” button.

Now that your project is both created and open, use Unity’s ‘Package Manager’ to import a couple of VR-related packages into your project:

In the drop-down menu, on the top left, find ‘Window > Package Manager’, and open the ‘Package Manager’.

Once the Package Manager window shows up, you can either scroll through the list or type in the search-bar to look for packages.

  • From the Package Manager, Click ‘Advanced’> ‘Show Preview Packages’.

Now, Find and Install these three packages with the Install button in the bottom right corner of the window:

  • The ‘XR Interaction Toolkit’ package
  • The ‘XR Plugin Management’ package
  • The ‘Oculus XR Plugin’

Now, with packages installed, you are ready to start changing the ‘build settings’ of your project!

Step 4. Project Build Settings

First, in the dropdown menu at the top left, navigate to ‘File > Build Settings’.

From Build Settings, you will want to switch your platform from PC to Android because, technically, the Oculus Quest is an Android device. (The Quest runs on a customized build of Android 7, and the Quest 2 runs on Android 10.)


  • Do this by selecting ‘Android’ in the list of ‘Platforms’ and clicking on ‘Switch Platform’ in the bottom right of the window
  • (Note: Currently, your project is empty, but in the future, this may take a while depending on how many assets in your project you need to reimport; ideally you would do this step before you’ve added anything into your project.)

Next, in the Build5 setting that will show up, Change the “Texture Compression” dropdown to ‘ASTC’.

Now, in the drop-down menu at the top left of Unity, navigate to ‘Edit > Project Settings’ and, in the window that pops-up, select ‘XR Plugin Management’.

Click on the ‘robot icon’ in the-top-right to bring up plugins for standalone devices, and check the box next to ‘Oculus’. It may take a minute to import. This is normal.

Now, you will need to adjust your ‘player settings’. Navigate back to ‘Edit > Project Settings’, and from the list on the left of the window select ‘Player’.

Name your Company and your Product Name. This will make it easier to find your app once it’s on your Quest device.

Then scroll down and find the “Minimum API Level” and set it to at least level 23 (6.0 marshmallow)

Step 5. Creating a Quick Scene

You need something to load onto your Quest device!

To do this, you have two options for the settings when creating your scene. There is the fast option, the “device based rig” option (by following the steps directly below)

or

You can use the most up-to-date option, “the action based rig” which takes a little longer… This is outlined at step 5a (Scroll down past the Device Based Rig Option Directions to view.)

Device based rig Option:

Create a new scene by navigating to ‘File > New Scene’.

With the ‘XR Interaction Toolkit’ installed, you should be able to navigate to ‘GameObject > XR > Device Based > Room-Scale XR Rig. For some, the action based rig may not track controllers first try, but the Device based rig will, and the priority is to make sure building and running onto the headset works.

Add a floor to stand on in your scene by going to ‘GameObject > 3D Object > Plane’.

Save your Scene: ‘File > Save’

Now that is saved, navigate back to ‘File > Build Settings’, and below the box at the top, click ‘Add Open Scenes’, and un-check the starting ‘Sample Scene’.

Step 5A. (Optional Alternative to Step 5)

Using the Action-Based Rig (Optional)
Unity’s new input system has a couple of useful features that you might want to use. In order to take advantage of the New Input System, you will want to use the Action-Based XR Rig (instead of the Device Based one). Note that these use different components from each other.
First Step: Go to the package manager, and under the XR Interaction Toolkit Window, find the “Default Input Actions” and import them.

  • After the “Default Import Actions” are imported, you will find the newly imported input action asset in your project folder.

  • Select the “XRI Default Left Controller”, and in the inspector, click the button near the top that says “Add to ActionBasedController default”. Then do the same thing for the XRI Default Right Controller.

  • Selecting this will add all the preset actions into the XR Rig. However, unfortunately the Rig prefab won’t be able to differentiate between right and left controller inputs unless you then go into Edit > Project Settings > Preset Manager and add a “right” and “left” filter to the newly created boxes. Do that now.

  • Now you can go ahead and add the Room-Scale XR Rig (Action-based) into your scene hierarchy

  • Finally, in order to make sure your input action asset is active in the scene, add the Input Action Manager component onto either an empty game object in your scene or onto the newly created XR Rig. Add a slot for an input action asset, and drag in the XRI Default Input Actions asset.
  • Navigate back to ‘File > Build Settings’, and below the box at the top, click ‘Add Open Scenes’, and un-check the starting ‘Sample Scene’.”

Step 6. Android Tools and Sideloading Time

Sideloading is a term used in the developer community that means installing an APK file onto an Android device. (APK stands for Android Package File.) Since the Quest devices are built on Android, sideloading means the same thing here.

In short, you will be sideloading an APK file from Unity onto your Quest device.

But, before we can sideload an APK file from Unity to your Oculus Quest, you need to first install some Android Development tools.

6 a. Install Android Developer Tools

  • Download Android Studio. Note: the Mac Download is on a different page)
  • After Installation, when you open Android Studio, find the ‘Configure’ button near the bottom right, click on it and select ‘SDK Manager’

Install any version of the SDK later than 4.4 Kitkat, API Level 23 (Use Level 19 or higher if Level 23 is not available), by checking the box and hitting “Apply” at the bottom right corner of the window.

Check the SDK Tools Tab to make sure you have Android SDK Build-Tools and Android SDK Platform-Tools installed.

6 b. Register with Oculus as a Developer

Now, in order to turn on Developer Mode on your Quest, you will need to register as a developer with Oculus:

Go to the Oculus phone app on your phone (The one you used originally to set up your Quest.)

  • Make sure your headset is turned-on and nearby so that your phone can connect to it.
  • Once you see that your Oculus device is connected to your phone, follow these directions to enable developer mode
  • Video Directions: https://youtu.be/CQ6TcLwSGag?t=260

Log in to your Oculus account.

6 c. Windows Users only: Download  ADB Drivers (This step not required for Macs)

If you are on a PC, download these drivers (Mac owners do not need to follow this step):

Extract the files

  • Navigate to the ‘androidwinusb.inf’ file> right click>install. Then, click ‘open’. Allow any messages

Step 7. Getting your phone and Quest ready

Now that you have followed the directions for enabling developer mode on your Quest, go get your smartphone and the USB cord you plan on using to connect your Quest to your computer…

Start with your smartphone

Find your headset in the Oculus phone app, and click on it to make sure it is enabled

Select ‘More Settings’, click on ‘Developer Mode’, and enable it.

  • You may be asked to create a Developer certificate. Accept.

Now the developer mode is enabled for the Quest through your phone, reboot your Oculus Quest by turning it off and on.

After it has rebooted, Connect your Quest device to your computer using a USB cord. (The charging cord that came with your quest will work as long as your computer has a USB C port.)

  • If you don’t have that kind of cord, you can shop for a compatible cord or adapter (USB C to USB or Get an Adapter).
  • If your computer does not have a USB C port, check to see if your Android smartphone charging cable will work.

Now that your Quest is plugged into your computer, look inside your VR headset.

There might (or might not) be a pop-up that asks you to “allow USB Debugging”. If so, click ok (using the Oculus Quests’ controllers.)

  • If you get an “Oculus Link” pop up. Click “Not Now.”
  • If it asks you to set up a guardian, go ahead and do so.
  • Then, take off your headset.

Go back to Unity and check to make sure your headset is recognized when it is plugged in.

  • Navigate back to  ‘File > Build Settings’, and see if your device is recognized under ‘Run Device.
  • (Note: You may need to hit the refresh button, seen below, after plugging in your headset.)

Now click ‘Build and Run’ at the bottom right of the ‘Build Settings’.

Name your build (and ideally save it in its own Builds folder.)

Be sure to wait for the build to complete before putting on your headset!


Behold, you have created a VR world with Unity! No longer are you confined to the limits of this reality.

If the app doesn’t start automatically when you put on the Quest, go to your ‘apps tab’ in your Quest device and find the section called “Unknown Sources”, where you can find the app by the name you gave it (e.g., MyFirstVRApp”).

If everything worked, you should be able to see your floor and a couple of red lines coming from your Controllers!

Congratulations

You have now, hopefully, built your first application for the Oculus Quest or Quest 2! Now, it is up to you to add items to your scene in VR.

Want to take your new VR dev skills further?

 Save your seat in an upcoming cohort!

Unity’s Mixed and Augmented Reality Studio (MARS): Is it worth the hype?

June 26, 2020

This post was co-authored by Craig Herndon, an XR Terra instructor.

Unity’s Mixed and Augmented Reality Studio (MARS), one of this year’s most anticipated releases in the XR development ecosystem, finally launched earlier this month. For many developers, the initial sticker price of $50/month or $600/year has shifted the discussion away from a much-needed feature set to one of skepticism. The focus has turned away from “what is MARS” toward the question of “is MARS worth it”? Here at XR Terra, we spent some time with MARS and would like to provide creators and businesses with some information that will help make that decision.

To make that point, we will be covering the following features in Unity’s MARS:

  • Simulation View
  • Proxy-based Workflow
  • Fuzzy Authoring
  • MARS Session

Simulation View

The biggest feature MARS provides is the Simulation View that comes with environment templates with the ability to test an AR application in a wide variety of settings such as a home, factory, office, or outside. You can even scan or model your own simulation environment. Before we get into how this works, let us look at the development workflow prior to MARS.

Pre-MARS Scenario:
Without MARS, once the App is ready for testing in Unity the developer would need to deploy to the device which depending on your PC specs and whether the target device is android versus iOS can take anywhere from 1 – 5 minutes. This alone is a large loss of time for any developer.

Once the app is deployed to the device, the developer then needs to take their phone and scan for the appropriate surface they are testing. Chances are that the desk or table in the office is not the same as what the end-user will be using. For example, if the expected use case is a factory then the developer will not be able to test reliably at all. This step can take another 2-5 minutes depending on what is being tested.

Once this workflow is completed the developer can now see the effect of the changes they make in their code – for example, if a tweak to their code worked, or if the object appears correctly – which would take at least another minute of time.

Best case scenario, the developer can make 15 changes in an hour. Worst case scenario, they can only make 4 changes in that hour. On average, most developer’s would fall in the 7 to 10 changes per hour range.

Keep in mind that the above times are for the happy path where everything is going smoothly, and you aren’t trying to track down a weird bug with the Android Debugger Bridge or the low-level debugger on iOS.

Post-MARS Scenario:
With MARS, developers can test by cutting out steps 2 and 3 by using the simulation environments. In the MARS sample, we have an energetic robot collecting blue crystals. The robot spawns at the first area scanned by the phone and the crystals spawn based on the type of surface the developer wants them to spawn on.

Proxy-based Workflow & Fuzzy Authoring

MARS provides developers with a Proxy script that allows uses to set the criteria where they want their objects to spawn – in this example, this is a flat horizontal surface of 2 ft by 3 ft or a vertical surface such as wall (see proxy example below). Instead of using precise or exact measurements, developers can set minimum and maximum conditions which Unity is referring to as “Fuzzy Authoring”. Once the proxy is set up a user can attach content that appears once this proxy is located in the environment. MARS also allows the creation of proxy groups that require multiple surfaces to be present for the app to work.

Users can then use the compare tool to see where in the simulation environment these conditions are met. (See screenshot of the comparison with the above.) We will dig deeper into how to set these up in a future blog post.

The powerful feature here is that by the click of a button the developer can visualize where these conditions are met and what types of surfaces the crystals will appear. If the developer had to use the original workflow then this could have taken 15- 20 minutes per location to walk around scanning the environment. With MARS this is now only the click of a button and instantly viewable.

Next, if the developer wishes they can also scan the virtual environment as if they were holding a mobile device. Check out the gifs below to see what this looks like. 

MARS Session

Another difficult problem AR developers face is scaling content relative to the real world. The MARS Session allows you to adjust the entire scene scale with a simple slider. This is useful because it is better to create content that can adapt to the user’s environment than require the user to find an appropriate environment for your application.

MARS has many more features that we are excited to dig into and will cover in future blog posts.

This initial scratch of the surface shows you that MARS can easily save several hours per day/week (depending on what and how much you’re doing) for creators and developers. This time can then be spent making a more robust application for a wide variety of environments and conditions with many more unique interactions.

Our vote on this is that it’s absolutely worth the additional fee to use Unity’s MARS, especially for professional developers and creators. Moreover, the 45 day trial period is an excellent opportunity for creators to get a hands-on feel and help them make the decision.

At XR Terra, we are very excited about us and our AR & VR Developer Program students using Unity’s MARS for their Augmented Reality and Virtual Reality industry projects! We will share our challenges and insights using MARS and other AR VR tools in future blog posts. So stay watching and let us know if you want to learn about a specific AR VR solution!

Happy Creating!

5 Easy and Mostly Free Resources to get Started with Unity

December 8, 2019

When you’re thinking about building experiences for AR, VR, or video game development for 2D and 3D games, your building platform choices can be overwhelming. However, they don’t have to be.

Why? Because, if you are interested in gaining the skills that will help you long-term, and you want to be able to develop complex and customizable content for almost any platform (AR/VR/mobile/desktop, etc.), the right choice is fairly obvious; it’s Unity.

There are several other reasons to choose Unity:

  1. It’s free (for small teams).
  2. It has a huge network of users.
  3. Its documentation is excellent
  4. There is a ton of up-to-date tutorial content out there for it!

Side Note: Before you jump into a tutorial, I recommend putting Unity in context. Be sure to, at least, read about Unity on Wikipedia. Understanding its history, relation to other game engines, and the diversity of uses for the engine certainly helped me gain a new respect for the platform!

Unity Learn: Roll a Ball

The best part about this tutorial is that it doesn’t require you to download anything! “Roll a Ball” teaches you all the basic functions of the unity editor by using the basic shapes and objects that already come with Unity. It is a video-based course, that walks you through, step-by-step, how to create a mini-game with a sphere that rolls around on a plane and collects objects. It’s simple, but it’s a fun and informative start to learning Unity.

Price: Free

Udemy: Complete C# Unity Developer 3D: Learn to Code Making Games

Looking for a more in-depth, programming-with-C# focused introduction to Unity? This course is one of the most popular Udemy courses on the subject. The teachers are really good communicators, passionate, and fun. Just be sure to wait for the course to go on sale. (Often, it is available for under ten US dollars.)

Price: $10-$148

Unity Learn Premium: Swords and Shovels

If you’re looking for a truly epic learning-journey that traverses game art, design, and programming within Unity, this might be your best choice from this list. However, full disclosure, I have not tried the course, so I can’t vouch for its quality. I just saw that it was comprehensive, and that caught my eye!

Price: 30-Day free trial, and Fifteen dollars a month after.

Unity Learn: Design, Develop, and Deploy for VR

This isn’t an intro to Unity course, to be fair, but it is a high-quality tutorial-series that gets you thinking about developing VR games (with a focus on Oculus headsets, but applicable to other platforms). (Note: Even if you can’t do some of the exercises, it is worthwhile watching the videos to learn how VR developers think and to learn VR development best practices.)

Price: Free

Lynda: Unity Training and Tutorials

Some of these tutorials are a little out-dated, but many of these Lynda (AKA “LinkedIn Learning”) courses are high-quality-content that teaches you Unity for a number of specialized use cases, from building for mixed-reality-apps to getting prepared for various Unity-certifications. Best of all for this option, most libraries in the United States and Canada give you free access to Lynda.com; just sign in using your library card on your local library’s website.

Conclusion

Although I recommend starting with the Roll a Ball tutorial, any of these courses will help you get started. Good luck and have fun! Want another tip for getting started? In terms of motivation, few things will make you want to learn Unity more than to start thinking now about what you want to build. So, start thinking now. You can turn almost anything into a game or 3D simulation with a little imagination. To see what I mean, check out this video of a developer starting with a picture and turning it into a video game.

Subscribe To Our Updates!